
Rain Harvesting Downpipe First Flush
Protect your rainwater quality by diverting the most contaminated water that washes off your roof with the first few millimetres of rainfall with a First Flush Downpipe Diverter.
WDDP01 | 90mm
WDDP02 | 100mm
Improve your rainwater quality
By diverting and discarding the most contaminated water from your roof, the First Flush Downpipe helps keep hazardous bacteria and fine particles out of your tank. This improves the quality of the rainwater you collect and is a key step in effective Rain Harvesting practices.
Customise and install with ease
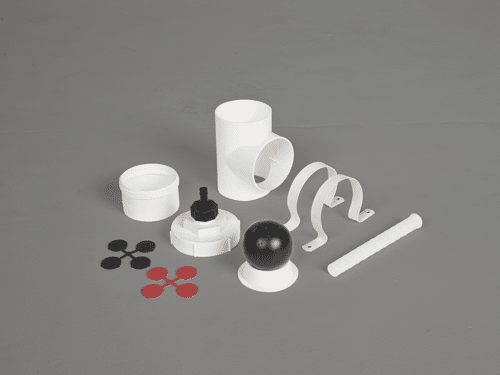
Supplied in a kit with T junction, ball and drip-drainer included, this first flush diverter can be installed on walls, posts, stands or even under your eaves. Simply add a customised length of pipe to divert your desired volume of dirty, contaminated water from each downpipe.
Irrigate your garden
The first flush diverter’s slow release valves automatically drains the dirty water you capture so you can enjoy the benefits of first flush diversion again and again. The draining water can feed your garden irrigation system or be discarded into stormwater.
Downpipe First Flush Water Diverters improve water quality and reduce tank maintenance by preventing the first flush of water, which may contain roof contaminants, from entering the tank. They help ensure cleaner water is available for use, which protects rainwater pumps and internal household appliances such as clothes washing machines, toilets, hot water systems, etc.
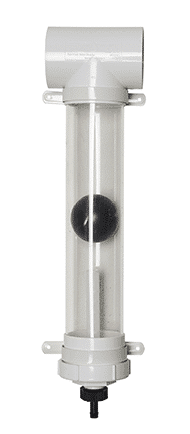
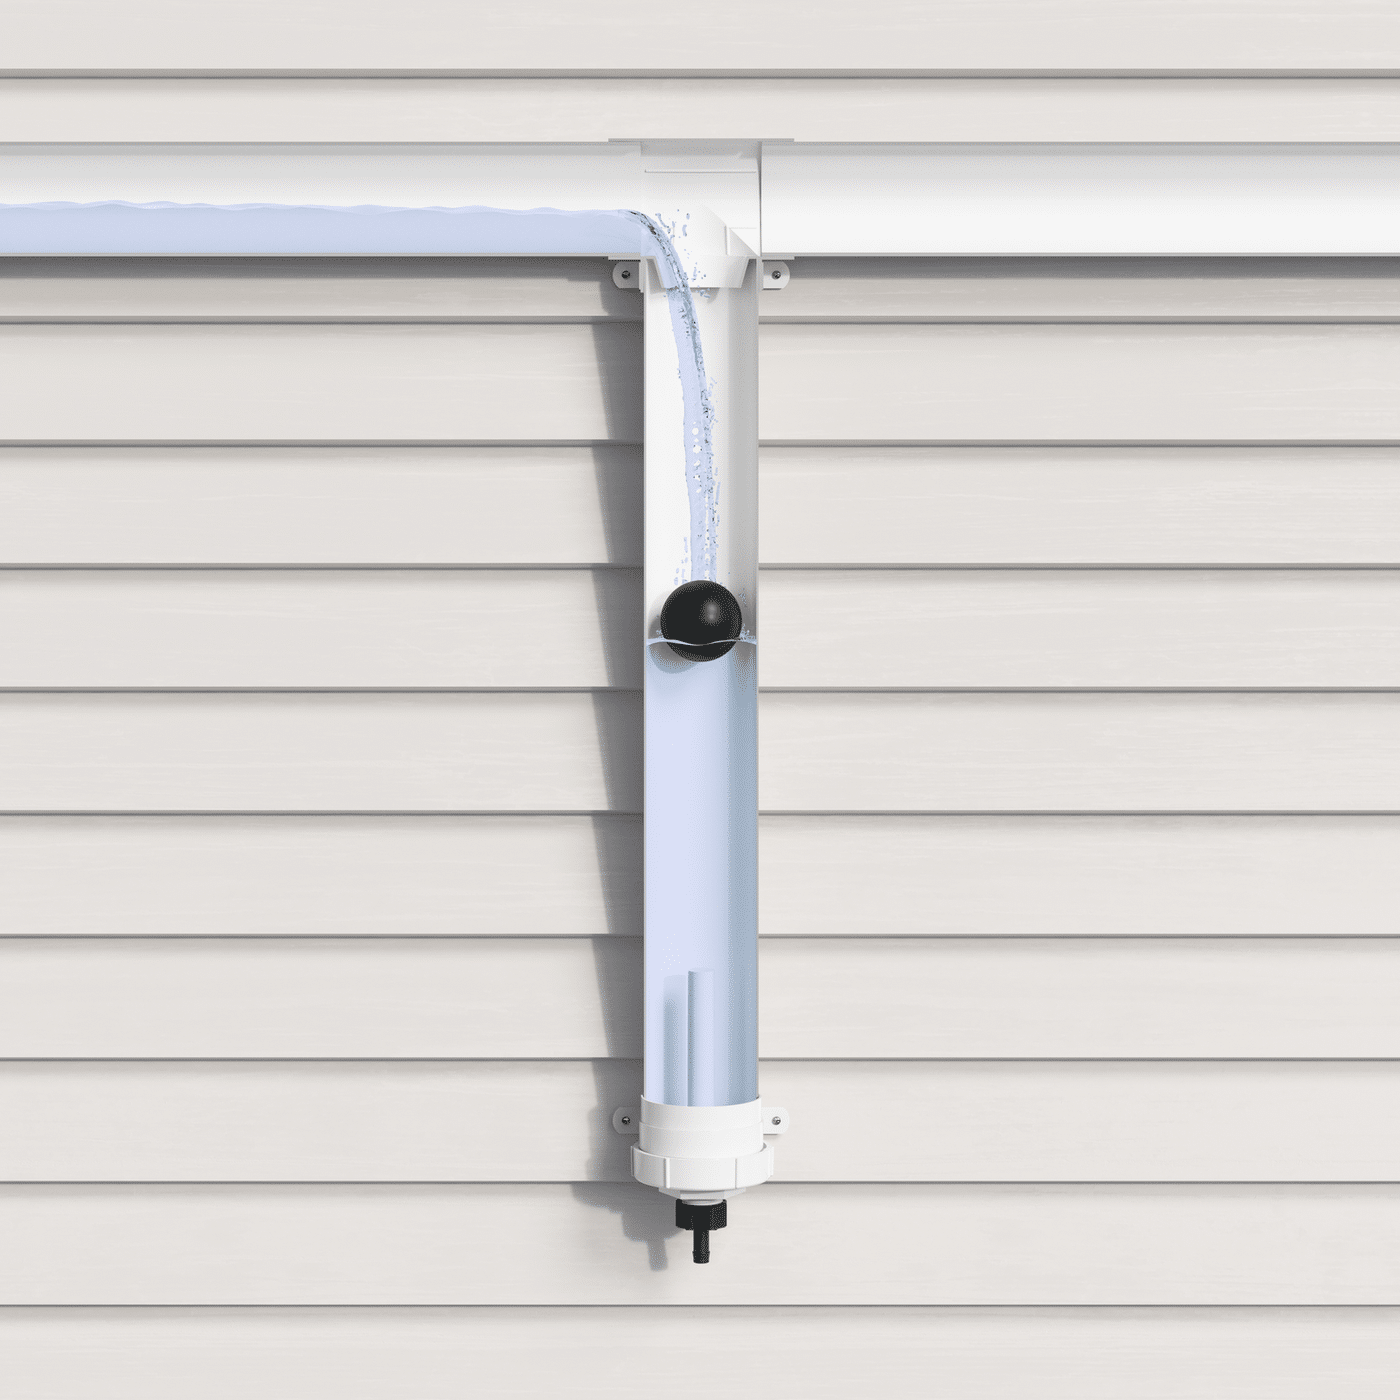
Downpipe First Flush Diverters, such as the 90mm and 100mm, are installed at each downpipe that supplies water to the tank. They utilise a dependable ball and seat system – a simple automatic system that does not rely on mechanical parts or manual intervention. As the water level rises in the diverter chamber, the ball floats, and once the chamber is full, the ball rests on a seat inside the diverter chamber preventing any further water entering the diverter. The subsequent flow of water is then automatically directed along the pipe system to the tank.
Improve your rainwater quality
By diverting and discarding the most contaminated water from your roof, the First Flush Downpipe helps keep hazardous bacteria and fine particles out of your tank. This improves the quality of the rainwater you collect and is a key step in effective Rain Harvesting practices.
Customise and install with ease
Supplied in a kit with T junction, ball and drip-drainer included, this first flush diverter can be installed on walls, posts, stands or even under your eaves. Simply add a customised length of pipe to divert your desired volume of dirty, contaminated water from each downpipe.
Irrigate your garden
The first flush diverter’s slow release valves automatically drains the dirty water you capture so you can enjoy the benefits of first flush diversion again and again. The draining water can feed your garden irrigation system or be discarded into stormwater.

Features and Benefits
- Prevents sediment, bird droppings, spiders, insects, mosquito eggs and debris from entering the rainwater tank.
- Improves water quality, protects pumps and internal appliances.
- Ideal to use in conjunction with a rain head.
- Easy installation, just add pipe and glue.
- No mechanical parts.
- Low maintenance requirements.
Calculate your diversion needs
Generally speaking, the more water you divert, the better the quality of the rainwater that ends up in your tank. However, diverting more rainwater than necessary can lead to volume shortages, so it’s important to calculate your diversion needs, and divert water accordingly.
The following formulas offer general guidelines for calculating how much water you should divert:
- Areas with low pollution (open fields, no trees, no bird droppings or animal matter, clean environment) = divert 0.5 litres of water per square metre of roof
- Areas with higher pollution (leaves and debris, bird droppings, animal matter/carcasses, pollution) = divert at 2 litres of water per square metre of roof.
This calculation will allow you to determine what length and size pipe or pipes you need for your diversion chambers.
The length of pipe required to form your first flush diversion chamber will depend upon how much water you need to isolate and capture.
The following measurements are given as a guide only.
Installation Guide
90mm Model
- Determine the length of 90mm pipe required for your first flush diversion chamber. As a rough guide: 1 metre of 90mm pipe holds approximately 5.9 litres of water. Ensure all cut edges are clean and smooth.
- Attach the threaded coupling to your diversion chamber pipe applying solvent weld glue to the socket of the coupling and pipe, then push together and hold until the glue sets.
- Select the appropriate flow control washer and fit it into the hose connector with the side marked “TOP” showing. Start by using the Control Washer with the smallest gauge hole (lowest number). Try a larger gauge Washer if experiencing blockages. Save the remaining washers for possible future use. Insert the plastic filter screen in through the base of the screw cap with O-ring seal and secure by attaching the hose connector and flow control washer.
- Attach the screw cap with O-ring seal (and assembled components) to the threaded coupling.
- Measure your existing downpipe and cut to create space for the T-junction. The outlet of your diverter must sit at least 150mm from the ground when fully assembled, so select your installation point and measure and cut accordingly. Ensure all cut edges are clean and smooth.
- Connect the T-junction to the existing downpipe and install with solvent weld glue in the same manner as step 2.
- Place the ball inside your first flush unit through the upper end of the diversion chamber pipe.
- Insert the ball seat into the T-junction, with the narrow end of the seat facing down.
- Apply glue to the T-junction and upper end of the diversion chamber pipe and insert the pipe into the junction and hard up against the ball seat, holding until the glue sets.
- Position your assembled first flush diverter in place and attach to the wall using the supplied brackets, supporting the unit until it is fully secured. The upper bracket must sit directly under the T-junction, where it will hold the weight of the unit.
100mm Model
- Determine the length of 100mm pipe required for your first flush diversion chamber. As a rough guide: 1 metre of 100mm pipe holds approximately 8.8 litres of water. Ensure all cut edges are clean and smooth.
- To attach the threated coupling to your diversion chamber pipe, insert a length of male 100mm pipe inside the threaded coupling and glue in place using an appropriate sealant. Glue the other end inside your diversion chamber pipe. Attach the threaded coupling to your diversion chamber pipe applying solvent weld glue to the socket of the coupling and pipe, then push together and hold until the glue sets.
- Select the appropriate flow control washers and fit it into the hose connector with the side marked “TOP” showing. Save the remaining washers for possible future use. Start by using the Control Washer with the smallest gauge hole (lowest number). Try a larger gauge Washer if experiencing blockages. Save the remaining washers for possible future use.
- Insert the plastic filter screen in through the base of the screw cap with O-ring seal and secure by attaching the hose connector and flow control washer.
- Attach the screw cap with O-ring seal (and assembled components) to the threaded coupling.
- Measure your existing downpipe and cut to create space for the T-junction. Your diverter must sit at least 150mm from the ground when fully assembled, so select your installation point and measure and cut accordingly. Ensure all cut edges are clean and smooth.
- Connect the T-junction to the existing downpipe and install with solvent weld glue in the same manner as step 2.
- Insert the ball seat into the T-junction, with the narrow end of the seat facing down.
- Place the ball inside your first flush unit through the upper end of the diversion chamber pipe.
- Apply glue to the T-junction and upper end of the diversion chamber pipe and insert the pipe into the junction and hard up against the ball seat, holding until the glue sets.
- Position your assembled first flush diverter in place and attach to the wall using the supplied brackets, supporting the unit until it is fully secured. The upper bracket must sit directly under the T-junction, where it will hold the weight of the unit.
FAQ
What comes in my first flush diverter kit?
- Ball Seat x 1
- Flow Control Valves x 8
- Plastic Filter Screen x 1
- Pipe/wall Bracket x 2
- Tee Junction x 1
- Sealing Ball x 1
- Screw Cap, Hose
- Connector & Socket x 1
Where should I install my first flush diverter?
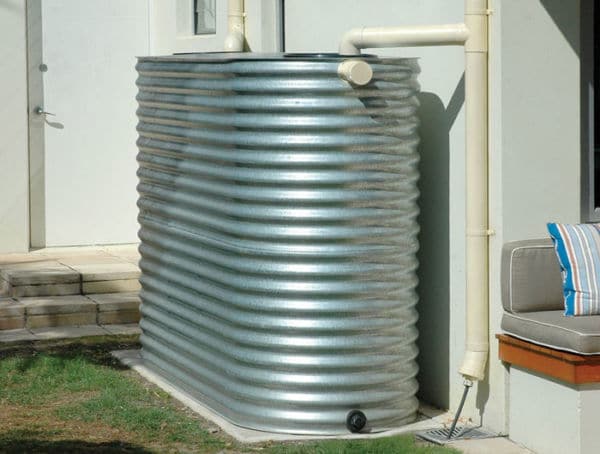
Your first flush diverter can be installed anywhere between your roof catchment area and your rainwater tank to isolate and capture the first “flush” of dirty water at the beginning of a rain event. You may choose to install smaller diverters to divert rainwater from each downpipe or you may choose to install larger diverters to divert rainwater from several downpipes.
How much water should I divert?
In areas with mild pollution (e.g. open fields, no trees, no bird droppings or animal matter, clean environment) you should divert 0.5 litres per square metre of roof (0.0125 gallons per square foot of roof). In areas with higher pollution (e.g. leaves and debris, bird droppings, animal matter/carcasses, pollution) you should divert 2 litres per square metre of roof (0.05 gallons per square foot of roof). These formulas will help you calculate your total diversion volume or, if you’re using more than one first flush diverter, the volume of water you should divert in each device (which will depend upon the size of the roof area that “feeds” each diverter).
How long should my first flush diversion chamber be?
The length of pipe required to form your first flush diversion chamber will depend upon how much water you need to isolate and capture. The following measurements are given as a guide only.
1 metre of 90mm pipe = 5.7 litres
1 metre of 100mm pipe = 8.8 litres
1 metre of 150mm pipe = 18.8 litres
1 metre of 225mm pipe = 45 litres
1 metre of 300mm pipe = 72 litres
3 feet of 3″ pipe = 1.5 gallons
3 feet of 4″ pipe = 2 gallons
3 feet of 12″ pipe =19 gallons
Can I run two or more pipes into one first flush diversion chamber?
Yes. Just remember that you need to size your first flush diversion chamber based on the size of the roof area that’s upstream from your diverter. If two or more pipes (aka lines) feed into a single diverter, you should size your diversion chamber accordingly by considering the total roof area that feeds both pipes.
Which flow control washer (valve) should I use?
Your first flush diverter comes with a range of flow control washers (valves). Each washer has a different sized hole. The size of the hole determines the rate at which your first flush diversion chamber will empty. A smaller hole will create a slower flow rate and release less water during a rain event, while a bigger hole will create a higher flow rate and release more water during a rain event. (Blockages excepted, any size washer will eventually fully empty your diversion chamber after each rain event.) Washers with a smaller hole will become blocked sooner than washers with a larger hole. Choosing your flow control washer is therefore a trade-off – lower wasted water during rainfall means more regular maintenance, while moderate wasted water during rainfall means less maintenance is required. However, when choosing your flow control washer, remember that the volume of water flowing from the largest washer, which has a 2mm diameter hole, will still be insignificant when compared to the rainfall flow rate.
Which way should the ball seat be oriented?
Your diverter’s ball seat is like a funnel: \ /. The narrow end is installed facing down so it can be sealed by the black ball.
How do I plumb the trickle feed outlet on my first flush diverter?
You can use 12mm irrigation tubing to plumb the trickle feed outlet to a location away from the diverter.
How do I clean my first flush diverter?
Slowly unscrew the black hose fitting from the bottom of your first flush diverter. If the diversion chamber is full of water, take care as the water empties. Remove the plastic filter (it may come out when you remove the black hose fitting) and wash under clean water. Check the flow control washer for any blockages and wash with clean water, then replace all these parts.